For those looking for an environment-friendly and efficient way to manage the decomposition of organic matter, indoor composting is a great option. By engaging in this type of practice, you can reduce your carbon footprint and help promote sustainability. Indoor composting is also incredibly easy and can be done with very little time or effort. In this article, we will discuss the basics of indoor composting, from gathering the necessary materials and setting up the process to ensuring its long-term success and avoiding common mistakes. So let’s get started!
What Is Composting?
Composting is the natural process of recycling organic waste into a valuable soil amendment. This process helps to improve soil structure and fertility by breaking down organic matter and releasing nutrients slowly over time.
Compost (the end-product of the composting process) can be created through several methods of composting including hot composting, cold composting, and vermicomposting. It can be used in home gardens or larger agricultural operations. It can produce excellent results leading to great soil structure and nutrient-rich products.
Indoor Composting Tips For Beginners

For those who are just beginning their journey with indoor composting, below are a few tips for them to remember:
1. Add The Right Amount of Brown and Green Matter
Carbon-rich and nitrogen-rich materials are essential ingredients for successful composting, whether you are composting aerobically or with worms. The ratio of brown to green material is usually 3 parts carbon-rich (brown) material to 1 part nitrogen-rich (green) material. For an indoor compost bin, the shredded paper serves as an excellent source of carbon-rich matter, while regular food scraps provide a great source of nitrogen-rich matter. By taking the time to properly layer these materials, your indoor compost bin will decompose the waste efficiently and effectively.
2. Chop or Tear Your Food Wastes Before Composting
Composting is a great way to reduce the amount of waste sent to landfills and turn it into something useful. It is important to remember that kitchen scraps bigger in size take far longer to decompose than smaller ones.
The larger the scraps, the slower will be the composting process, which leads to more waiting time for the end product.
To speed up the composting process, make sure you tear or chop your kitchen waste into small pieces so that they can break down faster. Hence, this will allow you to reap its benefits much faster.
3. Avoid Fruit Flies And Pests
In the summertime, it can be difficult to keep fruit flies away from your bin. However, by placing this bin in the freezer, you can prevent the fruit flies from getting in and enjoying your fruits and veggies.
With vermicomposting and aerobic composting, burying your food waste under a layer of soil helps to create an ideal environment for decomposition while also keeping pests at bay. In this way, you don’t have to worry about pesky fruit flies ruining your compost or other unwanted pests taking residence in the bin.
4. Get The Right Worm-to-Food Waste Ratio
Vermicomposting is an incredibly efficient way to reuse food waste. By utilizing red worms to break down kitchen waste, you can turn kitchen and organic scraps into nutrient-rich compost while minimizing your trash output.
To begin, measure the amount of kitchen waste your family produces every week. This will help you figure out how many red worms you will need to start vermicomposting. Generally, 1 pound of red worms will consume around 3.5 pounds of organic matter each week. So plan accordingly and get the right amount of worms for the amount of waste your household creates!
5. Watch For Breeding Worms
Keeping a healthy worm compost bin is essential to maintain the optimum growth rate and activity of your worms. When the conditions in the bin are right, there can be an abundance of worms that need more food than you are providing them all.
To avoid having too many worms, it’s best to share some of them with your friends. That way, you can ensure that no worms go to waste while your worm friends get the feed they deserve.
6. Keep Your Compost Moist
Moisture is an essential element in composting methods like vermicomposting and aerobic composting. It helps to transport oxygen which is needed by beneficial microorganisms to break down organic material effectively.
If the compost pile looks dry and appears to not be making much progress, it might be worth adding some water to it. This will help provide the necessary moisture to get the process going again. Not only that, keeping the compost pile moist can also help to prevent materials from clumping together or drying out.
7. Learn What Not to Compost
Composting is a great way to reuse your food waste, but not all kitchen scraps are suitable for the indoor composting bin. Foodstuffs like dairy products, meat, fish bones, or fats should be avoided as these can easily attract pests or slow down the composting process. These items may take longer to break down or disrupt beneficial organisms in the pile.
8. If It Smells Bad Something’s Gone Wrong
It is important to watch your indoor compost bin for any bad smells. Composting should never smell bad and watching for any bad odor can help you figure out if something needs to be changed.
With vermicomposting, a bad smell could be an indication that you might be over-feeding the worms and there is too much organic material. Otherwise, it could be anything from being too moist to not having enough oxygen.
What Are The Benefits of Indoor Composting?
Indoor composting provides several benefits to households looking to reduce their environmental footprint while improving the health and vitality of their gardens. These are as follows:
1) The main advantage of indoor composting is that it thrives year-round at a temperature between 40 to 80 degrees Fahrenheit; while in outdoor composting, compost piles or bins need to be sheltered from heavy rainfall or direct sunlight and insulated when the temperature falls below 40 degrees Fahrenheit.
2) It eliminates waste that would otherwise end up in landfills or incinerators, reducing greenhouse gas emissions and water pollution.
3) Compost also acts as a natural fertilizer, providing essential nutrients for plants, and contributing to healthier and more resilient soil.
4) Indoor composting is also far less labor-intensive than traditional outdoor composting and creates nutrient-dense soils faster.
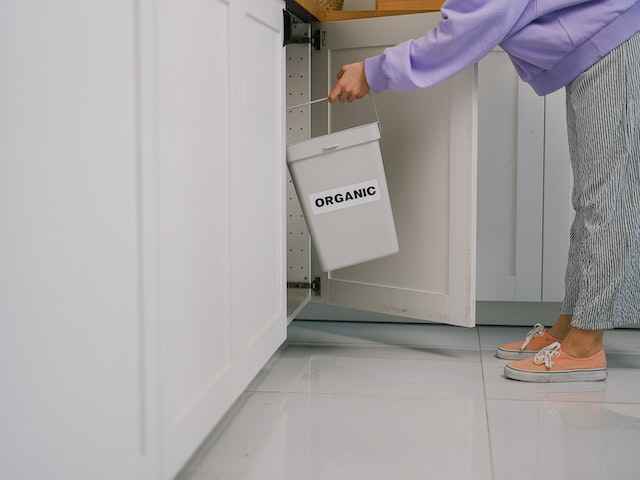
5) It is beneficial for people living in small spaces as they can store a compost container in any dark and dry space indoors, like in the basement, out on a counter, or even under-the-sink kitchen cabinet.
6) Finally, those who practice indoor composting are often able to save money by not having to purchase costly fertilizer from stores.
Indoor Composting Methods
1. Bokashi Composting
Bokashi composting is one of the most popular indoor composting solutions. It is an anaerobic fermenting process that uses inoculated Bokashi bran to ferment food waste into a nutritious tea for your crops and a secure soil builder.
In addition to the veggie and fruit scraps, you can also put more types of materials in Bokashi composting bin (called Bokashi bin) that are banned from traditional composting methods including eggshells, coffee grounds, fat, meat, tea, dairy, and even bones.
As you are filling up the Bokashi bin, press down on the waste to remove any air pockets inside. Once it is filled, you will have a fermented end-product (called pre-compost) after about two weeks. It is a faster method than any other type of composting, and the whole process takes about 4-6 weeks.
Technically, Bokashi composting is a kind of fermentation instead of composting as it ferments food and creates a substance that remains too acidic to be applied to plants. Thus, adding the bokashi matter to a compost pile or a fallow area of the garden is the last step in the bokashi composting process.
2. Aerobic Composting With a Compost Bin or Compost Tumbler
Aerobic composting is an easy and effective way to produce nutrient-rich compost. This method of composting requires oxygen for the microorganisms that break down the food waste into compost to survive that is why it is referred to as aerobic composting.
Proper airflow in your indoor compost bin, keeping the pre-compost moist and regularly turning or rotating the compost will all help your compost get properly aerated so it can do its job effectively.
Apart from indoor composting bins, which are easy to set up and maintain, you can also buy a compost tumbler which is basically a compost bin with a handle and does all the turning for you without any extra effort from you.
Indoor aerobic composting is an easy and efficient way of creating nutrient-rich compost without having you put in much work.
3. Vermicomposting With a Worm Composter
Vermicomposting is a fantastic way to transform your kitchen waste into useful and nutrient-rich fertilizer. Not only is it a great way to reduce the waste you send to the landfill, but it can also be done right in your home!
All you will need is a compost bin, some dirt, and worms – you can buy red worms for composting at any garden store or online. Once everything is set up, the worms will begin working their magic of transforming your organic waste into nutrient-rich fertilizer. With some patience, dedication, and effort your indoor worm composting should start producing results in as short as two to three months.
4. Indoor Composting Machine
Indoor composting machines or Electric composters are ideal for those who have limited outdoor space, or just don’t want the hassle of traditional composting. They take all the work out of the composting process and help you create nutrient-rich soil with minimal effort.
With an electric composter, you no longer need to:
- Monitor your compost pile for moisture levels
- Wait for it to break down fully
- Worry about pesky pests that might be attracted by its smell
Generally, these composters have two primary functions:
- Dehydrate and
- Compact.
After the end of this two-step process, a mass of dehydrated organic waste is left that can be:
- Used as boosters, or
- Tossed into the green bin, or
- Used as starters for compost piles.
Electric composters come in many shapes and sizes to fit your needs and budget. Some are even designed to use in your home kitchen so you can keep food waste out of the landfill.
These Electric composters quickly break down food scraps into rich fertilizer without any special technique or knowledge. All you need is access to electricity and then your garden will be one step closer to being bountiful.
How to Make Your Own Indoor Composting Bin?
Setting up your own indoor composting bin is an easy process.
The first step is to purchase a plastic bin with a tight-fitting lid and drill a few holes in the lid to allow air to enter. Hot glue the piece of a nylon screen or mesh to the inside of the lid to keep bugs (like fruit flies etc.) from getting in or out of the compost bin.
Find a place in your home such as the kitchen or another living space where you can store your composting bin conveniently. Place a tray beneath the bin in case of leaks.
Now, start filling your compost bin. Firstly, put soil on the bottom of the compost bin and then add some shredded newspaper/cardboard above the soil.
After that, add your kitchen waste like coffee grounds, banana peels, etc. Cutting your organic waste materials into small pieces will help them to decompose faster.
Compost bins require both “brown” materials (high in carbon), as well as “green” materials (natural nitrogen sources). So, keep a ratio of 2:1 green to brown for optimal performance. Add compost items regularly.
Mixing or turning the contents of the bin helps to avoid soggy and dry pockets in the bin, and aerate the mixture. A hand trowel or shovel can be used about once a week to move the contents of the bin around. Ensure to put the lid back on tightly to avoid attracting undesirable pests.
Which Items Are Good and Which Are Bad for Indoor Composting?
Items That Are Good and Bad for Indoor Composting
There are certain items that can be composted and some that should not be composted as they may introduce toxins or disrupt the balance of the indoor composting pile.
Good items for indoor composting include fruit and vegetable scraps, eggshells, coffee grounds, tea bags, grass clippings, leaves, newspaper, and paper towels.
Bad items for indoor composting include treated wood chips and sawdust, dairy products (except yogurt), and animal proteins such as meat, bones, or fish scraps. Composting these materials can create odors, attract pests or even introduce diseases into your garden soil.
Therefore it is important to only add things to your indoor composting bin that will help enhance the health of your garden.
DIY Indoor Compost Bins
In no time at all, you can create your own custom indoor composter from items around the home and enjoy composting with ease.
If you want to set up an indoor composting station then space will be your priority. Keeping that in mind, there are a few containers that can be a great option for indoor compost bins.
1. Wine crates, old wooden dresser drawers, or other boxes
With a bit of creativity and imagination, it is really quite easy to turn some household items into an indoor composter. You don’t have to buy a fancy and expensive compost bin. A wine crate or an old wooden dresser drawer is the perfect option for making an indoor composter. All you need is a piece of heavy fabric like a painter’s canvas or a hinged piece of wood cut to cover the top so that pests can’t get in.
2. Five-gallon buckets
Five-gallon plastic buckets are an excellent solution to many value storage needs in the home or office. Not only they are relatively inexpensive to purchase, but since they are stackable they can be stored neatly and with minimal space required. They are also multifunctional; if you get them with lids they make great food storage containers and even can serve as emergency toiletry holders.
You can buy them with matching lids at any home center or online. Just drill holes near the top of the bucket for aeration and your indoor composting bin is ready.
3. Plastic storage bins
A plastic storage bin is a great choice for making your own indoor composting container.
These can be found in a variety of sizes to accommodate whatever your composting needs may be and how much space you have. Ten-gallon bins can work, but eighteen-gallon bins are a better size as they will give you more space and flexibility. These bins often come with lids that have aeration holes, so you don’t have to worry about drilling your own. The best part about these types of bins is that you can stack them if necessary, allowing for maximum storage efficiency.
All in all, composting containers like these are the best way to go when getting started with indoor composting.
What are the Best Worms for Indoor Composting?
Worms are an essential part of indoor vermicomposting. Worms help break down organic waste and convert it into nutrient-rich organic fertilizer and soil conditioner It is used in gardening and organic farming.
Out of the 9,000 species of earthworms, only 7 are suitable for vermicomposting. It is essential to use an appropriate species. Two of the most commonly used are the red wriggler (Eisenia fetida), also known as red worms, and manure worm (Lumbricus rubellus). Nightcrawlers need to tunnel through the soil to survive and eat, and they are unable can’t live on vegetable waste. Also, don’t use worms that you might purchase at a bait shop or find outdoors.
So, red wiggler (Eisenia fetida), and manure worm (Lumbricus rubellus) are perfect for indoor composting as these species work best at low temperatures, which usually is the case inside a home or office setting.
You can start your bin with one pound (about 1,000) of worms. Keep in mind that worms, if you give them adequate food and provide a good home, can double their populations every 90 days. Thus, it’s good to start with slightly fewer worms than you need.
The worms feed on organic waste from the kitchen and provide high amounts of vermicompost with beneficial microorganisms.
Conclusion
Indoor composting is an excellent way to transform your kitchen waste into useful and nutrient-rich fertilizer. With the right tools, materials, and a bit of dedication, anyone can start their own indoor composting journey. From food scraps to paper products, there’s a never-ending variety of items you can add to your compost bin. This sustainable practice is not only beneficial to the environment, but it’s also good for your pocket too! With indoor composting, you can turn your household waste into something useful and create your own nutrient-rich soil amendment.
References:
1) Composting At Home – US EPA
https://www.epa.gov/recycle/composting-home
2) Composting Indoors – Cornell University
https://compost.css.cornell.edu/indoors.html
3) Indoor Composting with a worm bin – NYC.gov
Recommended Articles:
1) Compost & Types Of Composting (13 Methods Explained)
2) Vermicomposting (Worm Composting): Types, & Benefits
3) Bokashi Composting: A Complete Guide To Bokashi Compost
4) Backyard Composting: A Complete Guide
5) What To Compost & What Not To Compost: A Complete Guide
6) Tumbler Composting – A Comprehensive Guide